2 eggs 1/4 teaspoon of salt
1 cup vegetable oil 8 tablespoons of cocoa
2 cups brown sugar 1 cup milk
3 cups flour 1 1/4 teaspoons of vanilla
1 teaspoon of baking soda
Mix eggs with vegetable oil and sugar until creamy, then add flour, baking soda, salt, cocoa.
Add vanilla and milk.
Drop on greased baking sheet with teaspoon.
Bake at 375 degrees F. about 7 minutes.
Let cool.
Add filling between two cookies.
Filling recipe
5 tablespoons of flour 1 cup of milk
1 cup of sugar 1 cup of shortening
1/2 teaspoon of salt 1 teaspoon of vanilla
Mix flour and milk, and cook until thick, then cool.
Mix other ingredients.
Add the two mixtures together and beat until fluffy.
Red Brandywines ripening in the shade of the tomato trellis.Tomatoes ripening on the vine.
How did our tomatoes grow this year? They did quite well, thank you very much, and little thanks to me. My wife did most of the work. I just took the pictures and enjoyed the bounty.
As you may recall, we tried something different this year. Tired of the weighty tomatoes collapsing the stakes and metal cages we “secured” them with, my wife found a plan for tomato trellises. Our son, who has become quite the food guru, lives in a loft in Wooster, Ohio, 16 miles north of us. He and his wife have no outdoor space for growing the vegetables and herbs that he loves to use for his gourmet cooking. (See the May 27, 2010 post entitled “A beautiful morning well spent.”)
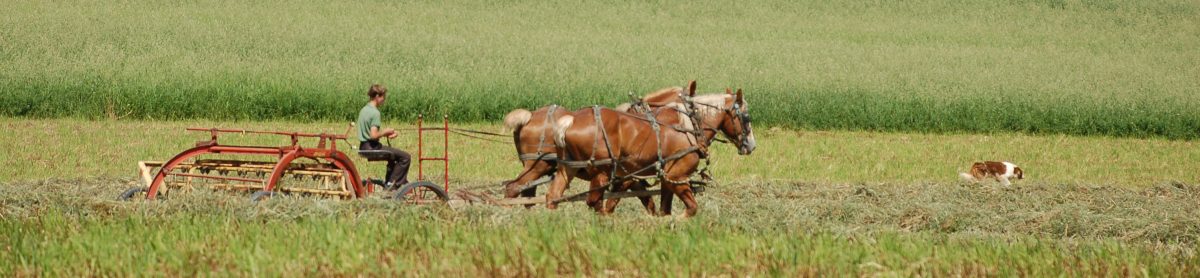
The Amish farm on which our home is built.
Our house is built on an Amish farm four miles southwest of Mt. Hope and four miles northwest of Berlin, the unofficial capital of Ohio’s largest Amish population. In other words, we’re out in the country with Amish neighbors and farms all around. Since our son drives right by us every workday, he asked to join us in our limited gardening. After the drought of 1988, we gave up most gardening. My wife turned to flower gardening, which adds a multitude of color to our little acre and a half each growing season.
The backyard wildflowers are only some of the beautiful flowers my wife cultivates each year.
The tomato trellis plans called for plenty of space, which required me to dig out more yard along the bricked garage wall at the south end of our home where we annually grow the tomatoes. We have discovered that the tomatoes seemed to thrive on the extra heat radiated by the bricks.
I dug out the grass by a couple of more feet, spaded the ground and added some horse manure the neighbor supplied when he fertilized the fields adjacent to our home. Our son, my wife and I erected a pair of the trellises on May 15. My wife purchased and planted a dozen heirloom tomato plants. Varieties included Hillbilly, Striped Zebra, Black Krim, Mortgage Lifters, Red Brandywine, Roma’s, and Old German. A friend from church also gave us an unknown variety. And several Yellow Pear tomato plants volunteered from last year’s crop.
Our son drove 7 ft. stakes into the ground to form the support of the trellis.
We purchased seven foot oak stakes at a local nursery. The original plans called for eight-foot stakes, but the sevens were the best we could find without having some special ordered at a much-increased price. The main stakes were pounded into the ground, and the lateral ones were spaced and tied with garden twine.
The plants seemed to grow slowly the first month. But once the summer heat and humidity really kicked in, the tomato plants boomed. My wife repeatedly tied the ever-increasing shoots as best she could. Still, the end result looked like a jungle.
The plants are still producing, but with the peak of the season behind us, the plants production has slowed considerably. We did have to fight a bit of blight throughout the summer, but the plants continued to thrive. And we enjoyed their abundant production.
Green Zebra tomatoes growing on the vine.
I especially enjoyed the Green Zebras and the Hillbilly. They were sweet and low on acid. Sprinkled with a little sea salt, they made many summer lunches on the back porch tasty and enjoyable.
My wife also made delectable tomato salads with slices and chunks of the different varieties offered on the same plate, sprinkled with fresh mozzarella cheese and virgin olive oil. Cuttings of fresh basil perfectly seasoned the offering.
A plate of colorful heirloom tomatoes.Heirloom tomatoes ready to eat.Just some of the beautiful and delicious handy work of my wife.
Of course my industrious wife also canned whole tomatoes as well as chunked tomatoes, made tomato soup, and peach salsa. I did persuade her to reveal her delicious tomato soup recipe, which is as follows:
Tomato Soup
Group 1
14 qts. cut up tomatoes (preferably Roma’s)
14 stems of celery cut up
14 bay leaves
27 whole cloves
1 green pepper diced
Cook the above until all vegetables are soft. I use a roaster. Then put through a strainer. I let the initial liquid drain off before cranking the strainer handle. I can this for juice. Keep hot until ready to add group 2.
Group 2 (Note that any recipe with dairy products like butter and cream should be properly pressure canned.)
12 Tbsp. flour
1 # butter
6 tsp. salt
1 cup cream
16 Tbsp. sugar
Slowly cook group 2 to make a paste.
In a kettle/roaster bring the strained group 1 to a boil and add group 2. Stir often. Bring back to a slow boil. This is not a thick soup.
Put in jars, makes approx. 17 pints. Process in a water bath 30 min.
When ready to use put 1 jar in kettle with ½ jar milk and heat thoroughly.
Neva Stambaugh
Of course I tried to document the progress of the tomato growing and harvesting throughout the summer. Following is a sequence of how our tomatoes grew following the May 15, 2010 installation of the trellises.
Tomatoes mid-June by Bruce StambaughTomatoes mid-July.Tomatoes mid-August.Tomatoes mid-Sept., beginning to die out.Tomatoes in blossom.Green tomatoes on the vine.Ready to pick.
By the way, after the first frost, the plan is to disassemble the trellises and store them for the winter. We also plan on extending the growing area yet again to allow more room to maneuver between the garage and the trellises.
We found several advantages to using the trellises. They were much more effective in cutting the loss of tomatoes to dry rot. Varmints, especially the four-legged variety, caused less damage, and the tomatoes were much easier to pick.
If you used trellises or have other options and suggestions, we would like to hear them. Please leave a message with your successes, ideas and lessons learned.
Enjoy your tomatoes while they last.
Bruce Stambaugh
Sept. 29, 2010
Roma tomatoes awaiting the canner.A variety of heirloom tomatoes.
Fresh strawberries ready for the fresh out of the oven shortcake.
Anytime I mention my wife’s good cooking, or in this case baking, I should automatically include the recipe. But you know how men are. However, having enjoyed yet another meal of the sweet, spongy cake, smothered with strawberries and moistened to taste with a little skim milk, I thought it best to post the recipe, with compliments to Neva and appropriate recognition to the late Doris Janzen Longacre, who compiled the More-with-Less Cookbook from whence the recipe originated. – Bruce Stambaugh
Carla’s Hot Milk Sponge Cake
1. Preheat oven to 325 degrees Fahrenheit.
2. Beat two eggs in mixing bowl.
3. Add one cup of sugar and one teaspoon of vanilla and beat until light.
4. Combine separately one cup of flour, one teaspoon of baking powder and 1/4 teaspoon of salt.
5. Fold dry ingredients by hand into egg mixture.
6. Bring to boil in a small saucepan 1/2 cup of milk and one teaspoon of butter/margarine.
7. Add this mixture slowly into the batter, stirring gently.
8. Pour the batter into a well-greased and floured 7″ x 12″ or 9″ x 9″ cake pan.
9. Bake 30-35 minutes.
Preparation
1. Find a mess of morels.
2. Rinse with water.
3. Slice the larger mushroom in half.
4. Place the mushrooms in a container of well-salted water.
5. Soak for 10 minutes.
6. Dump the water and rinse the mushrooms again.
7. Wrap the mushrooms in paper towels until ready to cook.
Cooking
1. Heat a well-seasoned cast-iron frying pan on medium heat until it’s hot.
2. Pour the mushrooms into the heated pan.
3. The remaining water in the mushrooms should immediately begin to sizzle.
4. Keep turning the mushrooms into their own moisture in the pan.
5. Once the moisture begins to dissipate, add either a dab of clarified or real butter or some extra virgin olive oil.
6. Add a pinch of sea salt.
7. Stir the mushrooms into the melting butter or olive oil.
8. Keep stirring until the mushrooms just begin to look wilted.
9. Turn off the heat.
10. Remove the mushrooms from the pan.
11. Enjoy.


You must be logged in to post a comment.